Model Inspector
Summary:
_Note: Starting with TIP V4.0, fiducial point placement is fully automated using neural network technology. The system automatically identifies and places anatomical landmarks for the EEG 10-10 system, drastically reducing the need for manual fiducial point placement.
Import the generated anatomical 3D model into the GUI by selecting Import and loading the model file from the inputs/input_1 directory. Place the fiducial points Nz, Iz, LPA, and RPA by selecting Sketch then Point in the GUI, rename them using F2(have to be called Nz, Iz, LPA and RPA exactly), and export them to the outputs/output_1 directory with the .sab extension.
Automated Fiducial Point Placement (TIP V4.0+)
In TIP V4.0, a sophisticated neural network automatically identifies and places anatomical landmarks for the EEG 10-10 system, including the following fiducial points:
- Nasion (Nz)
- Inion (Iz)
- Right Pre-Auricular (RPA)
- Left Pre-Auricular (LPA)
These points are then used to automatically derive the entire 10-10 electrode system on the head model.
Manual Placement
In case of failure of the automated fiducial point placement, or for TIP V3.0 and earlier versions, manual placement may be required. The procedure is as follows:
Now that the anatomical 3D model is generated, it needs to be imported into the newly open GUI. Selecting Import, the model file to be loaded should be in the inputs/input_1 directory. Now, the user can place the fiducial points that will be used for the positioning of the electrodes on a 10-10 system.
Fiducial Points
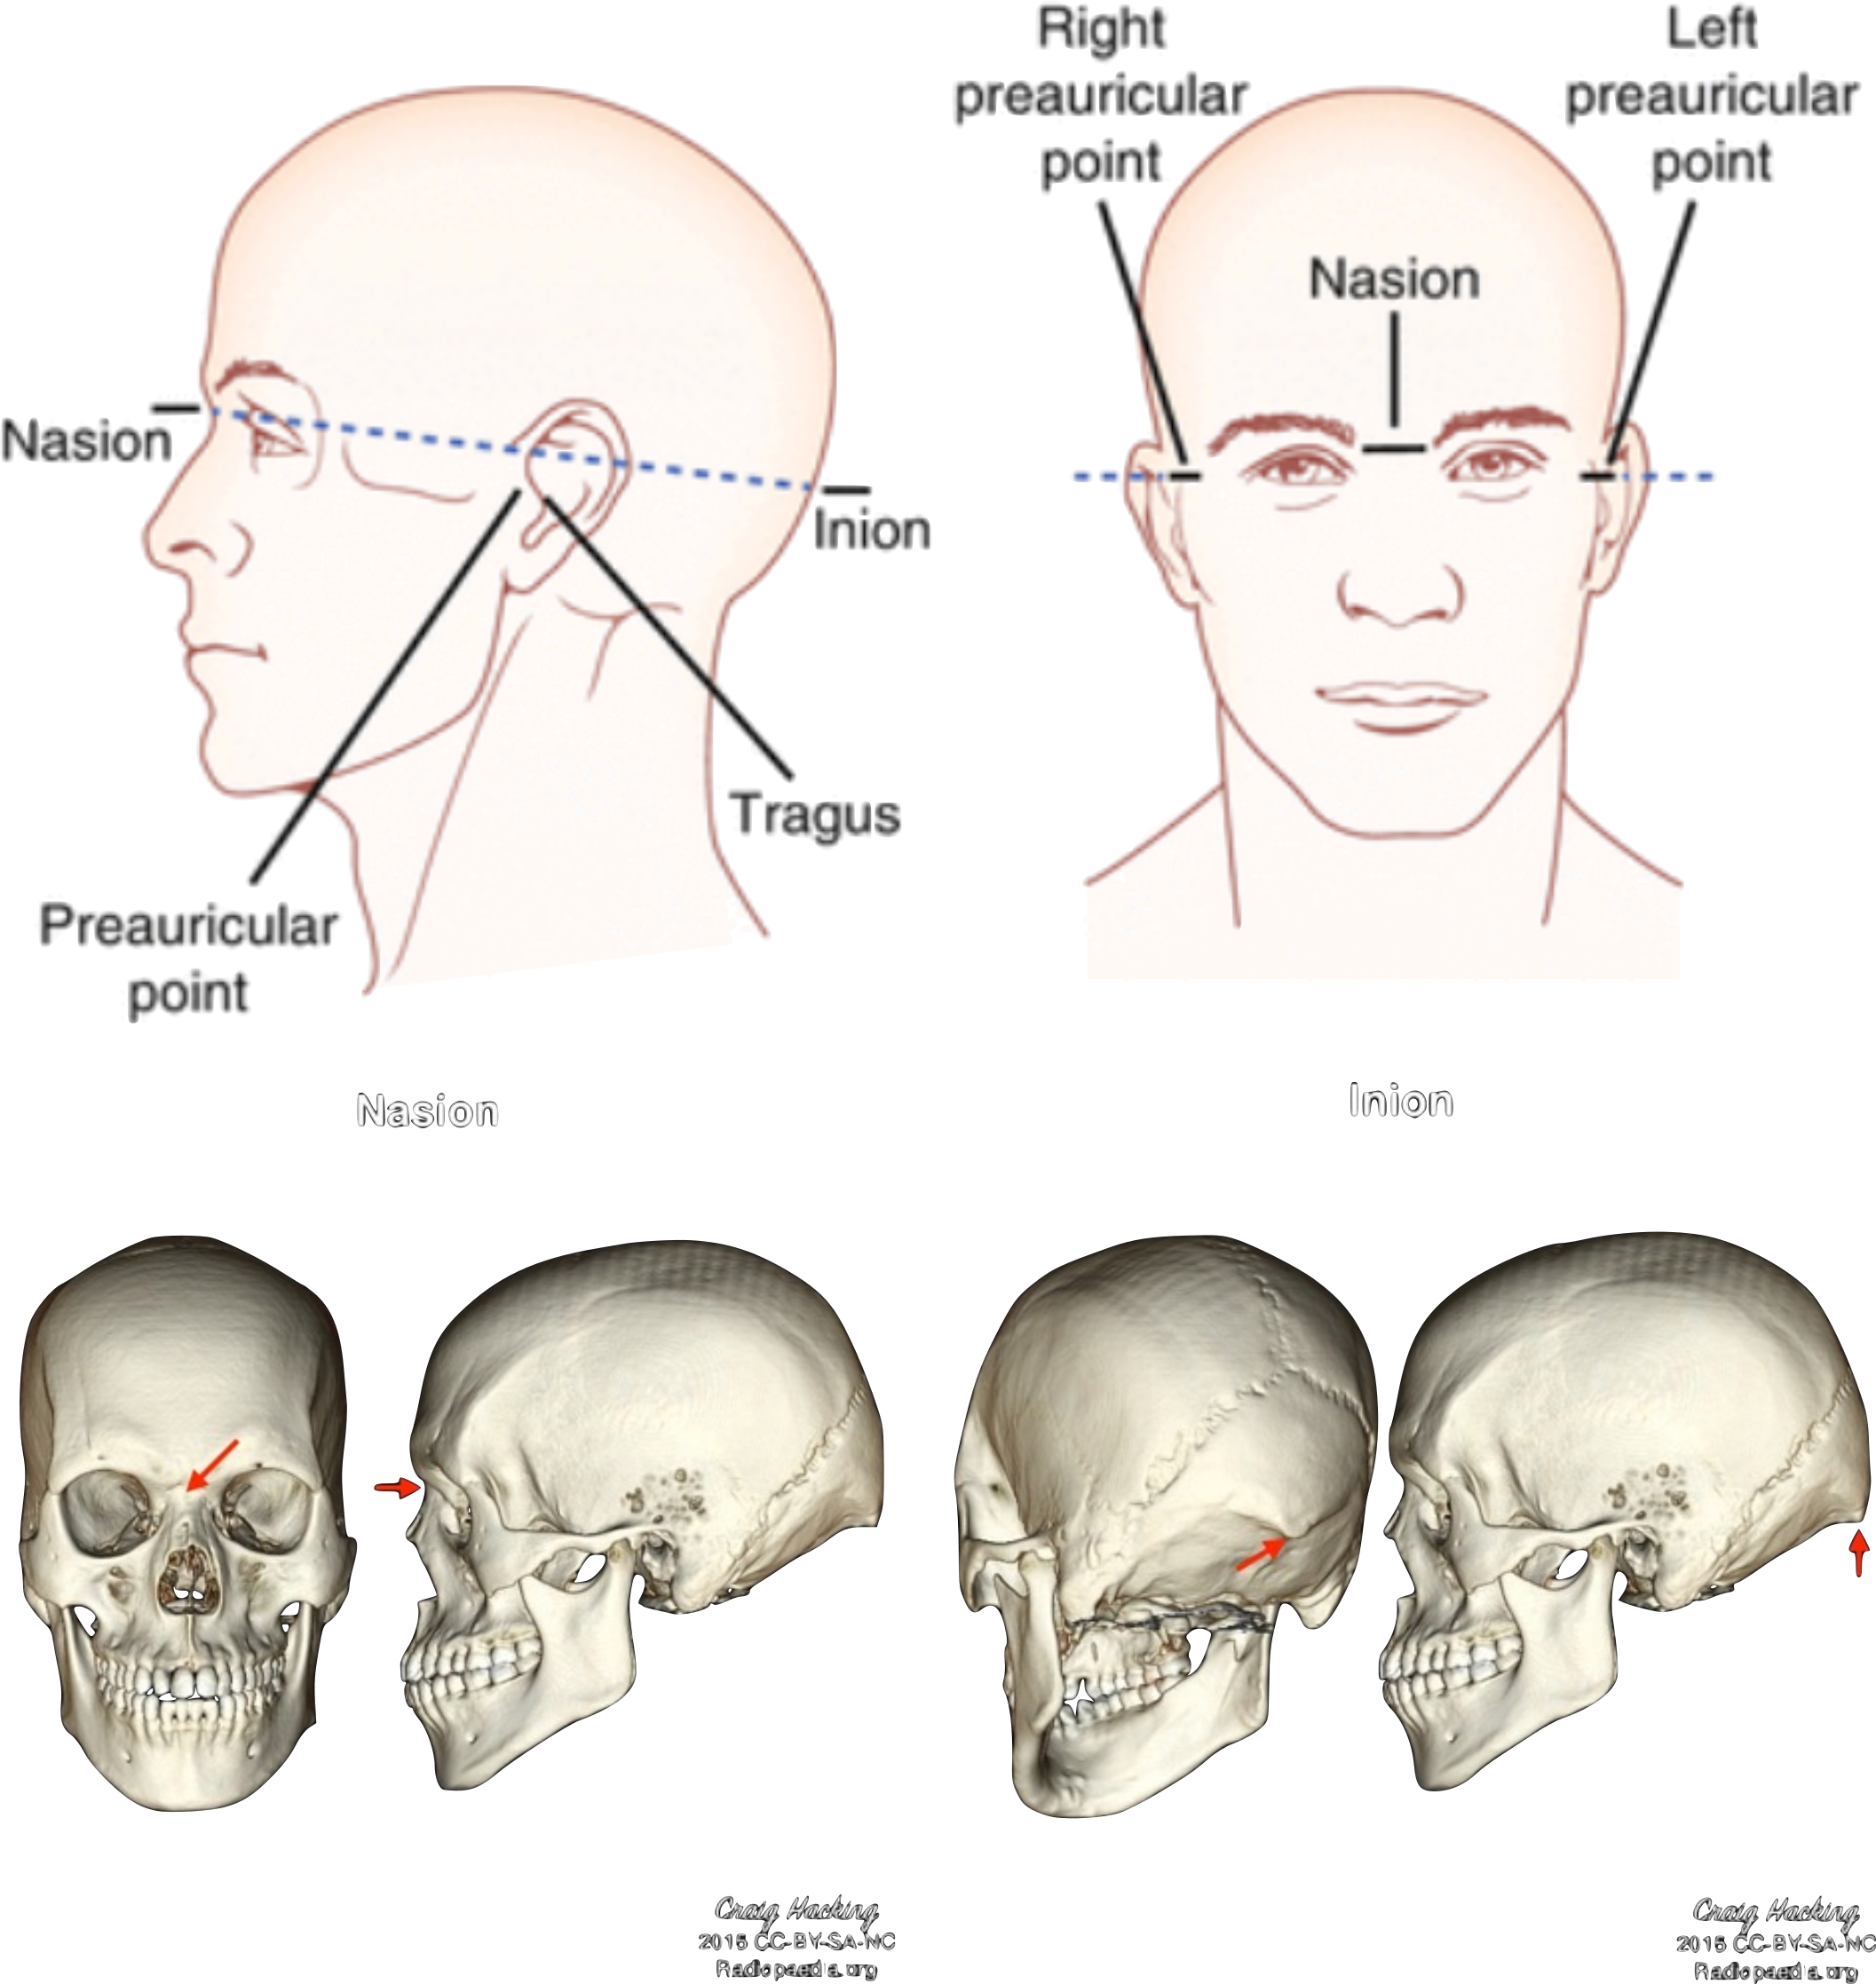
- Nasion (Nz): The depressed area between the eyes, just above the bridge of the nose.
- Inion (Iz): The crest point of the back of the skull, often indicated by a bump.
- Right Pre-Auricular (RPA): Frontal to the right ear, on the posterior root of the zygomatic arch.
- Left Pre-Auricular (LPA): Frontal to the left ear, on the posterior root of the zygomatic arch.
In the top ribbon of the GUI, selecting Sketch then Point allows for the creation of points directly on the model visible in the 3D viewer on the right.
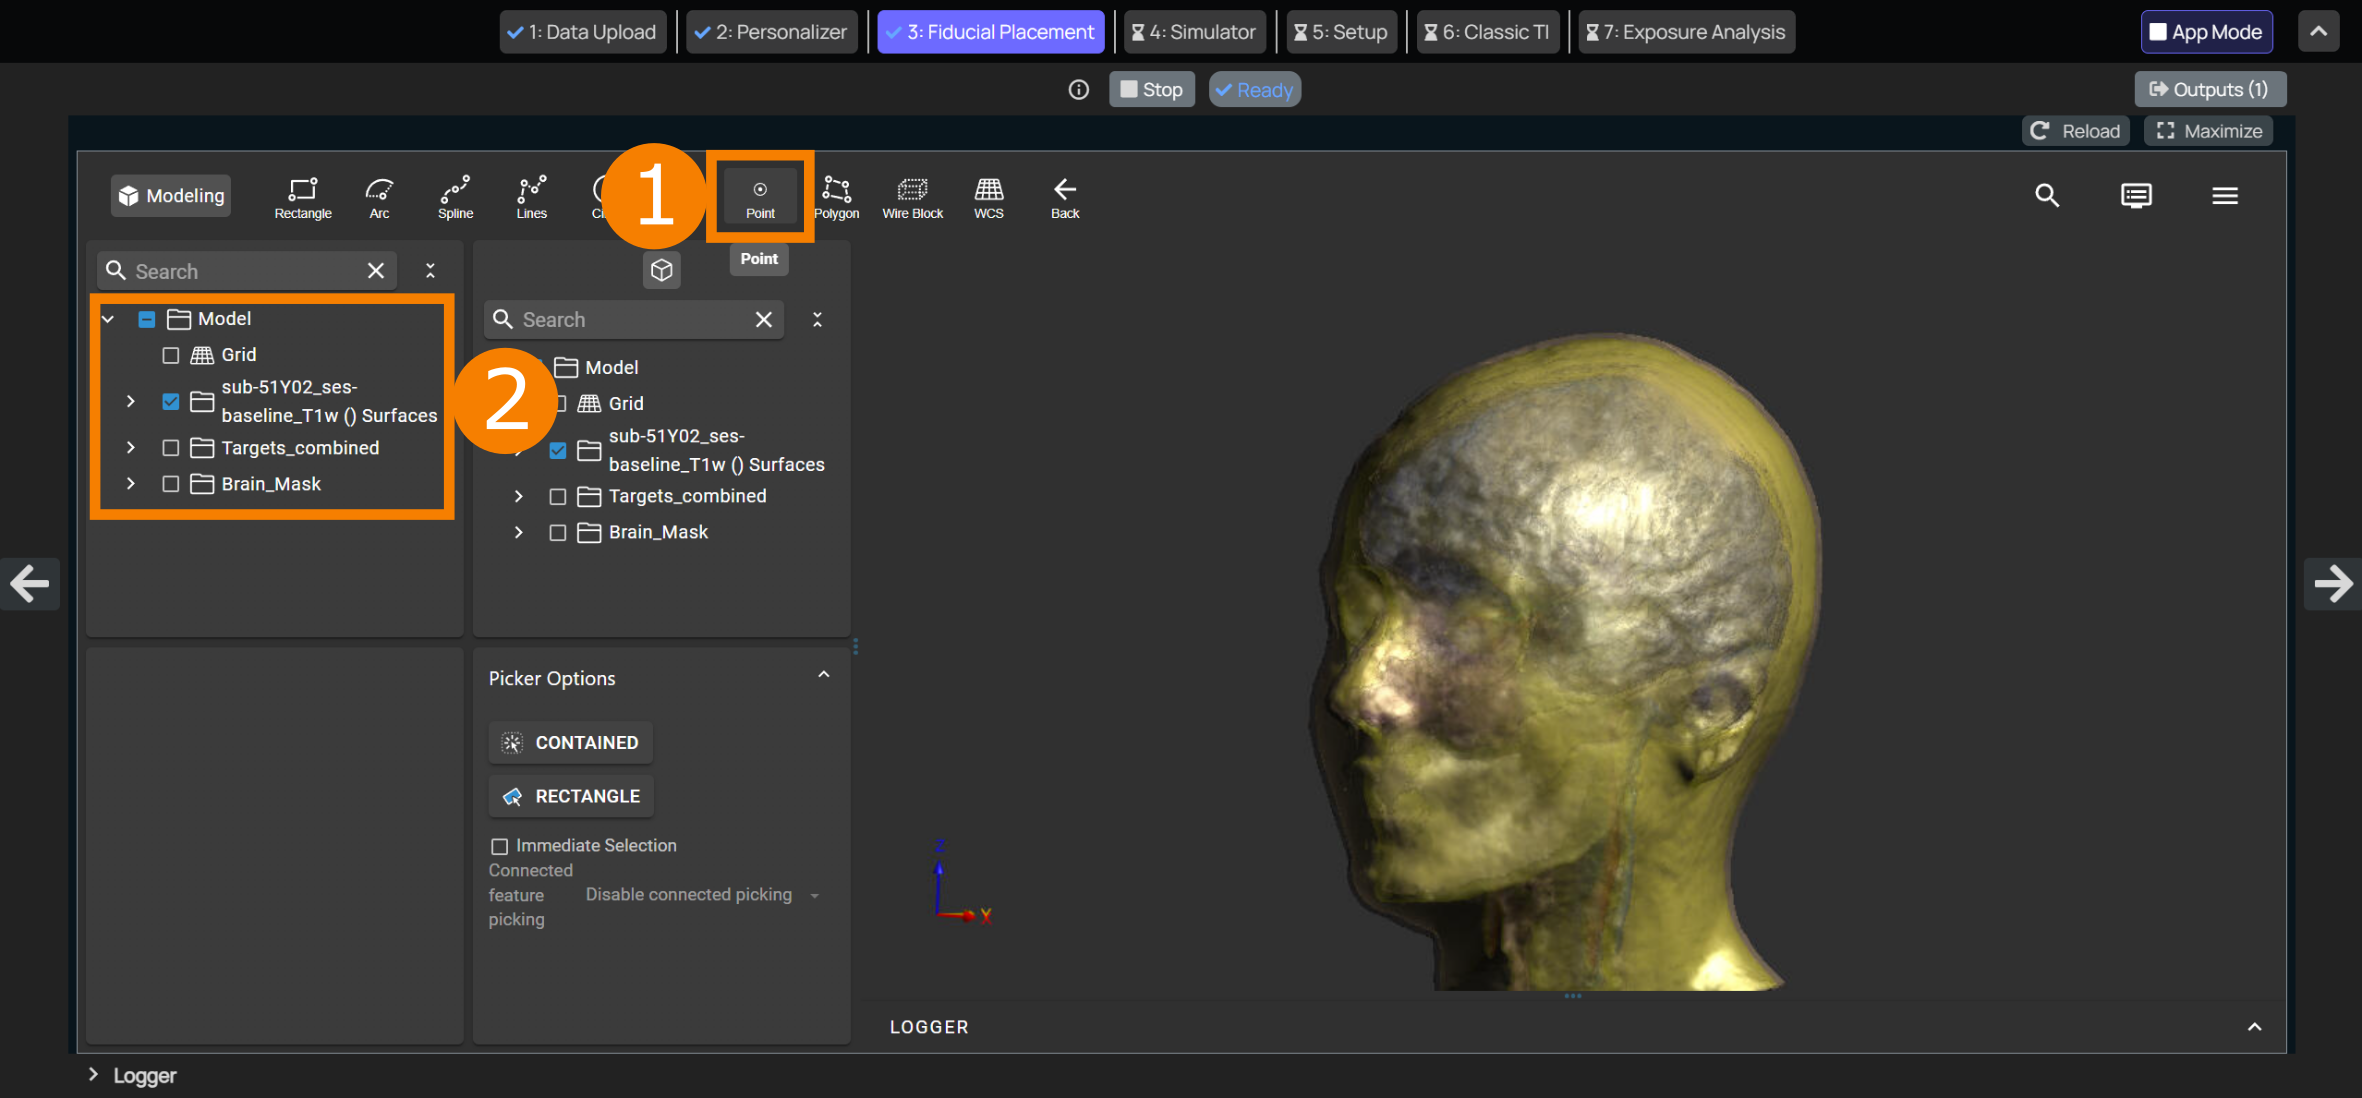
The Fiducials Placement interface has the following elements:
Place Points To place a point, select
SketchthenPointin the top toolbar and click on the chosen location in the 3D model.Model Tree This part of the UI shows you an exact overview of all the entities visible in the model view. This entails entity groups containing different tissues for example.
Users are asked to create 4 points, representing positions Nz (nasion), Iz (inion), LPA and RPA (left/right pre-auricular). These points should be properly renamed according to their position (Nz, Iz, LPA, RPA). This can be done using the shortcut F2.
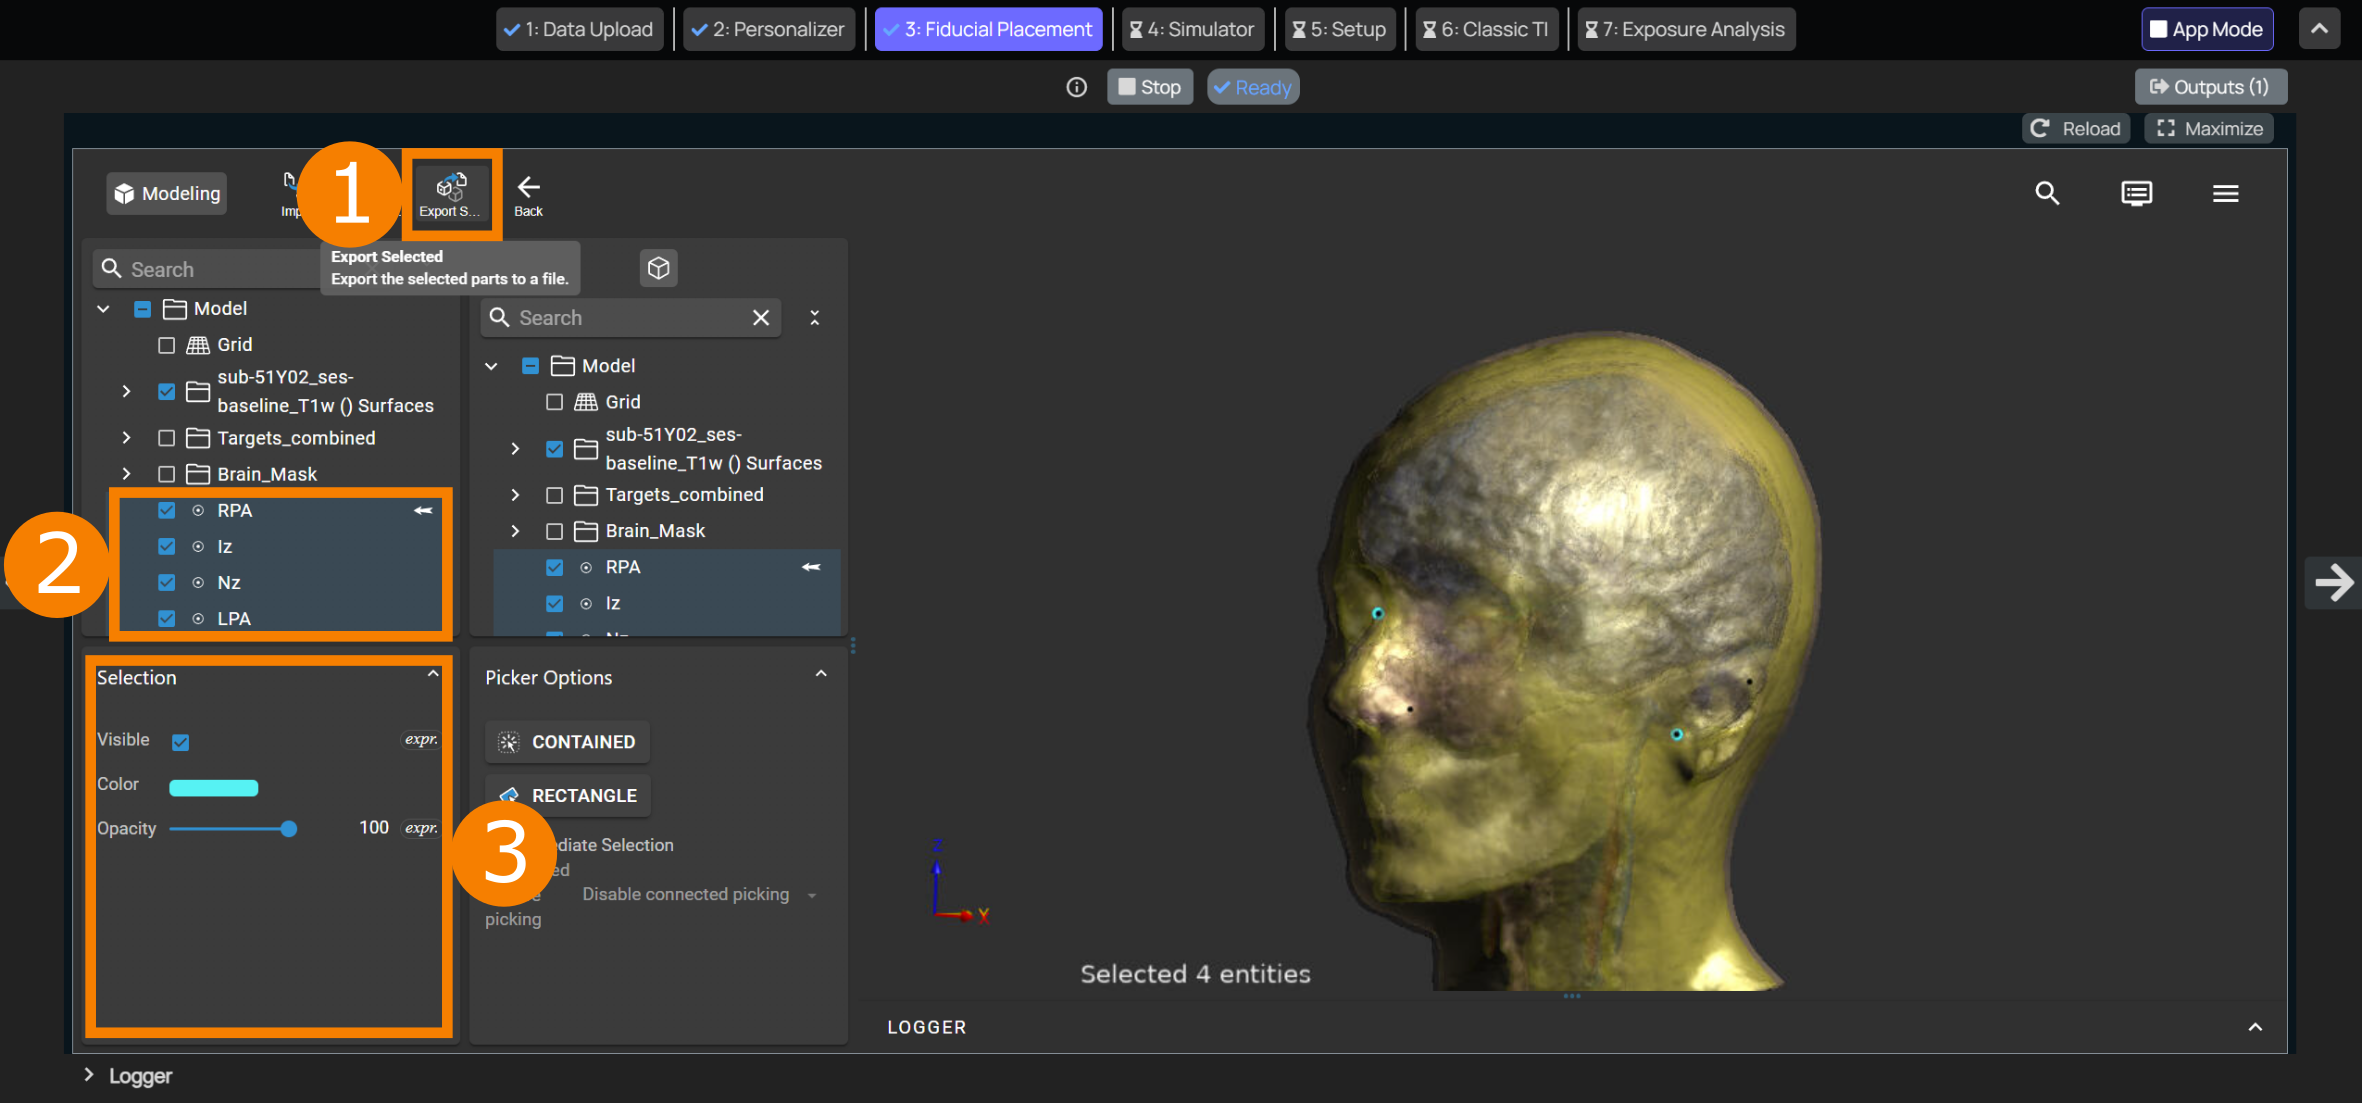
Once created, points need to be exported by selecting them and clicking Export Selected in the top ribbon to put them in the outputs/output_1 directory. Please specify the file extension .sab in the file name.
Export Selected Clicking this button will open the file explorer, where the selected entities can be saved to a file.
Fiducial Point Entities Once points are placed on the 3D model, they appear in the model tree. Here they can be renamed, deleted or selected for export.
Selection Details When selecting an entity from the model tree, this section of the UI will display information and editable settings.
Fiducial placement workflow: